Showing posts with label Google. Show all posts

Friday, 22 February 2013

Personalize Your Android Homescreen with Ultimate Custom Widget


Personalize Your Android Homescreen with Ultimate Custom Widget

ucw_top
Widgets are wonderfully versatile additions to your Android home screen. They can provide access to various features of the apps you have installed, make it easier to access settings, display information about your device, and much more. Using Ultimate Custom Widget, you can turn dev and create your own widget without the need to code a single line.
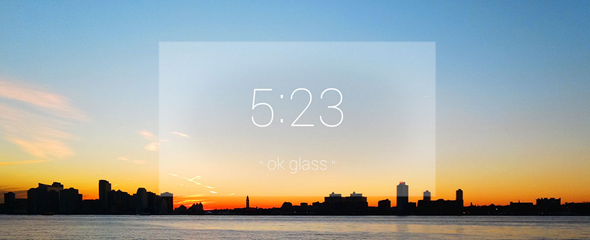
The widgets you create can include a combination of weather, date, time, and indicators to name but a few. There is no need to root, no need to mess around with system files, just an easy-to-use WYSWIG editor that will have you getting creative in next to no time.

Download the App

To get started you will need to down a copy of Ultimate Custom Widget – it is free of charge from Google Play.
You should not expect to jump straight in and create the most amazing widget the world has ever seen; there is something of a learning curve to endure. But persevere with the app and you will reap the rewards.
Before you do anything else, it is worth visiting the app’s settings to get a few basics configured straight away. There’s nothing to stop you from doing this later on, but it makes sense to have everything working the way you want it to from the word go.
Here you can choose which service should be used for the weather forecast, whether or not the widget should update when the screen is turned off, and various other settings.
With this out of the way, you can start to create your first widget. Ultimate Custom Widget (or UCCW) gives you an empty workspace to get creative in, and while this can be as intimidating as it is for an artist to stare at a blank canvas, you are not left completely on your own.
Tap the +/- button at the top of the screen and you can select from any of the available widget elements. These can be added one by one, or you can add everything you think you are going to need in one fell swoop – just tick the box next to any element you want to use.
If you opt to add more than one item, they will all pile up in the upper left hand corner of the canvas. Tap the Select Object button and you can then select the one you would like to work with and drag the object around the canvas to position it.
Depending on which object is selected, different options will be displayed in the lower portion of the screen. You will always be able to scale an object or use the Position controls to fine-tune where it should be placed, but there are also object-specific settings such as choosing between different clock styles.

Adding Interactivity

Having a widget that displays information is great – and there are quite a lot of indicators and other tools you can choose from – but adding interactivity helps to make widgets even more useful. Tap the menu to the upper right of the screen and select ‘Hotspots mode’. Select On and then restart the app after it closes.
To add a hotspot that can be used to trigger different actions, click the Select Object button followed by the Hotspots option. Tap the #1 button, select 1 and then use the Position, Width and Height button to place it wherever you want it – you could decide to place a hotspot over a clock which can then be used to access clock settings.
Just what a hotspot does is partly down to you, and partly down to the apps you have installed. You can configure a hotspot to launch any application, or access a feature of one of your apps. Tap the Hotspot button and choose from one of the four options.
Selecting Clear Hotspot wipes out any settings that are already in place, while selecting App enables you to choose an app to link to. Select UCCW to make the hotspot link to one of the built in functions of Ultimate Custom Widget, or Shortcut to access options in other apps.

Adding a Widget

When you are happy with what you have created, save the widget by selecting the ‘Save/export skin’ option from the main menu. Give your widget a name and close the app to return to your homescreen.
Opt to add a widget to the homescreen, select one of the various sizes of UCCW widget you want then select the ‘skin’ you’d like to use and you can enjoy your new widget.
Have fun creating widgets of your own. Share your thoughts in the comments below.

Install the Ubuntu Touch Preview on Your Nexus Phone or Tablet

Install the Ubuntu Touch Preview on Your Nexus Phone or Tablet


ubuntu touch - Install the Ubuntu Touch Preview on Your Nexus Phone or Tablet
UBUNTU TOUCH

Install the Ubuntu Touch Preview on Your Nexus Phone or Tablet

 Whitson Gordon
If you just can't contain your excitement for Ubuntu's new phone and tablet OS, Ubuntu Touch, you can flash the developer preview on your Nexus phone or tablet right now.
The developer preview (which is in alpha stage and should be considered veryexperimental) is currently available for the Galaxy Nexus, Nexus 4, Nexus 7, and Nexus 10. All you'll need is a computer running Ubuntu, some command line-fu, and nerves of steel. This process requires an unlocked bootloader and will wipe everything on your phone, so make sure you make a nandroid backup and save it somewhere safe before you start. Hit the link below to see the full instructions.

Build Up Your Google+ Community With These Great Tips

Build Up Your Google+ Community With These Great Tips


Though there was a lot of hype surrounding Google+, a lot of people who tried it out ended up returning to their usual social networks, like Facebook. However, if you thought that Google+ was dead, gone, and buried for good, you may be pleasantly surprised. It’s still kicking and some communities are actually flourishing on the platform.
Never heard of Google+? That’s okay! You may want to check out Maggie’s Google+ guide for a great introduction to the platform. But for those of you that want to start a community on Google+ (or maybe you already have one that isn’t taking off), I have a few tips and pieces of advice to give you that might just propel your group to a whole new level.

Define Your Target Audience

When starting any kind of community, whether it’s on Google+ or not, you need to keep a single thought in mind at all times: which niche am I going to fill?
People flock to a community because that community fills a void that no other community can fill. After all, if you’re starting a new community for chefs, why are people going to join your community when there are dozens of other chef-based communities out there already? You can create a community of chefs, but you’ll need to target a specific type of chef to which no other community caters.
If you aim your community at a niche that has no coverage, those kinds of people will want to join you. They’ll have no choice but to join you since there’s nowhere else to go. So instead of targeting chefs, you can try to target chefs on a budget or self-taught chefs or anything else.

Set Up the Community

Once you’ve created a Google+ community (which is as easy as click on “Communities” in the sidebar and typing in a name for your community), you’ll want to set it up so that all of the details are informative. That way, whenever someone stumbles upon your community, they’ll know all they need to know to make their decision: “Do I want to join this community or not?”
Use a catchy name. If you want people to remember your community, pick a name that is: short, easy to say, easy to spell, and unique. If you’re really creative, try to create a pun or double meaning with your community name. Also, use a catchy tagline that describes your community in a dozen words or less.
Set a community picture. When you see the profile of a person or community and see the default blank photo, what is your first thought? “This community is brand new OR the manager doesn’t update it.” To prevent others from thinking that same thought about yourcommunity, make sure you use a community picture. It can be anything as long as it’s not the default!
Description and location. Google+ lets you set a description and location for your community. The description is crucial for anyone who passes by and sees your page: it’s the one chance you have to hook the user and intrigue them. The location is more for localized communities centered in a specific area.
Categories. Like forums, you’ll want to create different “categories” for different types of discussions within your community. Be careful that you don’t create too many, though, otherwise you’ll spread your discussions too thin and your community will seem barren or abandoned.
To do any of the above, just click on the “Actions” button on your community dashboard and select “Edit Community.”

Moderate and Prune

Depending on the size of your community, you may want to promote some of your members to moderator status. A moderator can add and edit categories, delete posts, kick or ban members from the community, and promote others to moderator status.
Why are moderators important? As any avid forum user can attest, there are always bad apples in a community, no matter what kind of community you’re talking about. These bad apples will instigate fights, insult other users, post illegal or inappropriate material, and just cause mayhem. Moderators are there to keep order amidst the chaos.
Similarly, moderators guide and prune your community. If you want your community to be about a certain local sporting phenomenon, then your moderators can steer your members whenever they go off topic. Therefore, it’s important that you pick the right people as your moderators.
To promote a member to moderator status, simply click on “Members” under your community’s profile photo. Find the member that you want to promote and click the drop-down arrow next to their name, then select “Promote from member to moderator.” That’s it!

Get the Word Out There

Once you have a proper idea of what you want your community to be, once you’ve set up your community details, and once you have a proper moderating force, you’ll want to advertise your community to those who haven’t heard of it. There are a couple of ways to do this.
Personal invitations. If you click on “Actions” on your community dashboard and go to “Invite People,” you’ll be able to invite specific people directly by entering their Google+ names or email addresses. This is great if you already know people who would have an interest in your community.
Public announcements. Visit other communities that are similar to yours but not exactly the same. Find different interests that might overlap with your own. For example, a forum for new college students might be a good place to find users that are interested in your chefs on a budget community. Announce that you’re open to members and people will gradually trickle in.
Word of mouth. The best way to grow your community is to be so great that your members advertise on your behalf. Word of mouth is probably the most potent form of marketing so take advantage of it. Work hard, amaze your members, and they’ll tell everyone about your awesome community.

Engage With Members

Once you’ve invited people to your community and you start seeing some growth, don’t stop! You need to keep interacting with your members, keep discussions going, and keep the momentum rolling. There’s a point when the community will be self-sustaining, but you won’t reach that point for a while.
Engaging with your community members is the best way to keep them interested. If they’re interested, they’ll keep coming back. The more they come back, the better the chance that they’ll post and reply to other members. If people keep posting and replying to each other, the community seems active, which entices new users to stick around. It’s a vicious cycle.
On the other hand, if you disappear, the users will wonder where you went. Did you abandon the community? If so, then why should the members stick around? They’ll begin to leave one by one until your community is a ghost town. Stay engaged, create a hardcore group of diehard members, and build on that with more engagement.

Conclusion

Again, Google+ isn’t dead. Will it still be here tomorrow? That’s something for the experts to ponder and predict. Just know that right now Google+ is definitely a valid platform for building and growing a community. If you don’t like using the other social networks, give Google+ a shot.
In case you weren’t aware, MakeUseOf has our own community area on Google+ so go check it out and engage with us! As for your own community, take the above advice to heart and you’ll build it up, slowly but surely.

Windows 8 for Android completely for Free


Windows 8 for Android completely for Free


How to Use This App in your Android Mobile?

  1. First of all download "Windows 8 for Android" from the above link.Please note that this Application is in android format i.e ".apk" so you will have to transfer it to your android mobile for using the same.
  2. Once you downloaded the Application, transfer it to your Android mobile and install the same there and enjoy..
Don't keep yourself quite .Please provide us positive or negative comments .Your positive as well as negative comments are most welcome. If you have any suggestion to make this site better then inform me ,i will think about it.

Google Offers Us The Future With Their Latest Glass UI Video

Google Offers Us The Future With Their Latest Glass UI Video

Google is, quite literally, looking to change the way we view our digital world with the innovation Project Glass, and although we've seen a few glimpses of life through the company's digitized lens, the Mountain View-based search giant has today released a video outlining how users may one day interact with the UI. Following on from the news of prototypes being issued to select individuals, the video shows how the weareruses the phrase 'OK Glass' to kick the spectacles into action, prompting them to record video, take photos, send messages, start Google+ Hangouts, and more. It's arguably the most exciting insight we have been given into Glass thus far, and we have the full two-minute clip of the prototype in action after the break.
Project Glass clearly has the potential to change the game in unprecedented fashion. The Big G published a video much like the one below when it announced Project Glass last year, but this latest one offers a little more in the way of detail, and also the progress made over the past twelve or so months. The interface looks wonderful, with all the information displayed appearing relevant and unobtrusive, and although it is almost certainly subject to some alterations before it hits the market, it's a case of so far, so good.


As a hardcore geek, it's hard not to be movedby the potential and possibilities presented by Glass. From sending messages and video calling to satellite navigation, the world couldbe one's oyster, and although Glass has always seemed like something that would only ever feature in a sci-fi flick, Google's recent move to begin finding early testers and creatives to help evolve the technology makes it feel just that little bit closer to being real.


If Project Glass continues to move as quickly as it appears to have done in the past year, we could be looking at one of the biggest tech innovations of all time. That may seem alittle outlandish given the current early prototype, but having seen, in two short minutes, what Glass can do, the smartphone as we know it may well soon have a major threat.